
Before you dive into the amazing tips in this post, I would like to share some insights on the collaborative effort that made it possible to bring these fantastic people and their valuable advice together.
When this blog post series has been launched in 2020, I initiated one of the biggest global collaborations amongst food content creators by having over 70 participants joining the first 3 episodes. You can check all previous episodes of the Pro Tips blog series here.
When I opened the contribution opportunity again at the end of 2023, the level of interest has truly over-exceeded my expectations. It is quite unbelievable to say, that this time, more than 85 creators has decided to share their insights, valuable tips and extensive experience again as part of this series. Some of them participated in the first 3 episodes and there are many new faces who decided to join this initiative.
I invited content creators - such as photographers, stylists, bloggers...- purely based on their output, that I consider to be at a professional level. Otherwise, there were no specific criteria set for the participants. I presented them all with the same list of questions, but asked to respond only to the topics that were relevant to their creative journey - therefore each episodes will have varied amount of tips.
A wonderful bunch of creatives have accepted my invitation from all around the world. They have various technical skills and versatile backgrounds, but what they all have in common is their unique work that radiates their personal style. Some of them are doing photography as a hobby or just started their businesses-ventures, others are well-established entrepreneurs for many years in business, and I'm sure, that you will also recognise quite many industry-leading figures who became our idols over the years.
I found it quite fascinating, how many different angles each participant used to approach and elaborate on a single topic - I hope you will find their valuable insights just as much helpful as I did!
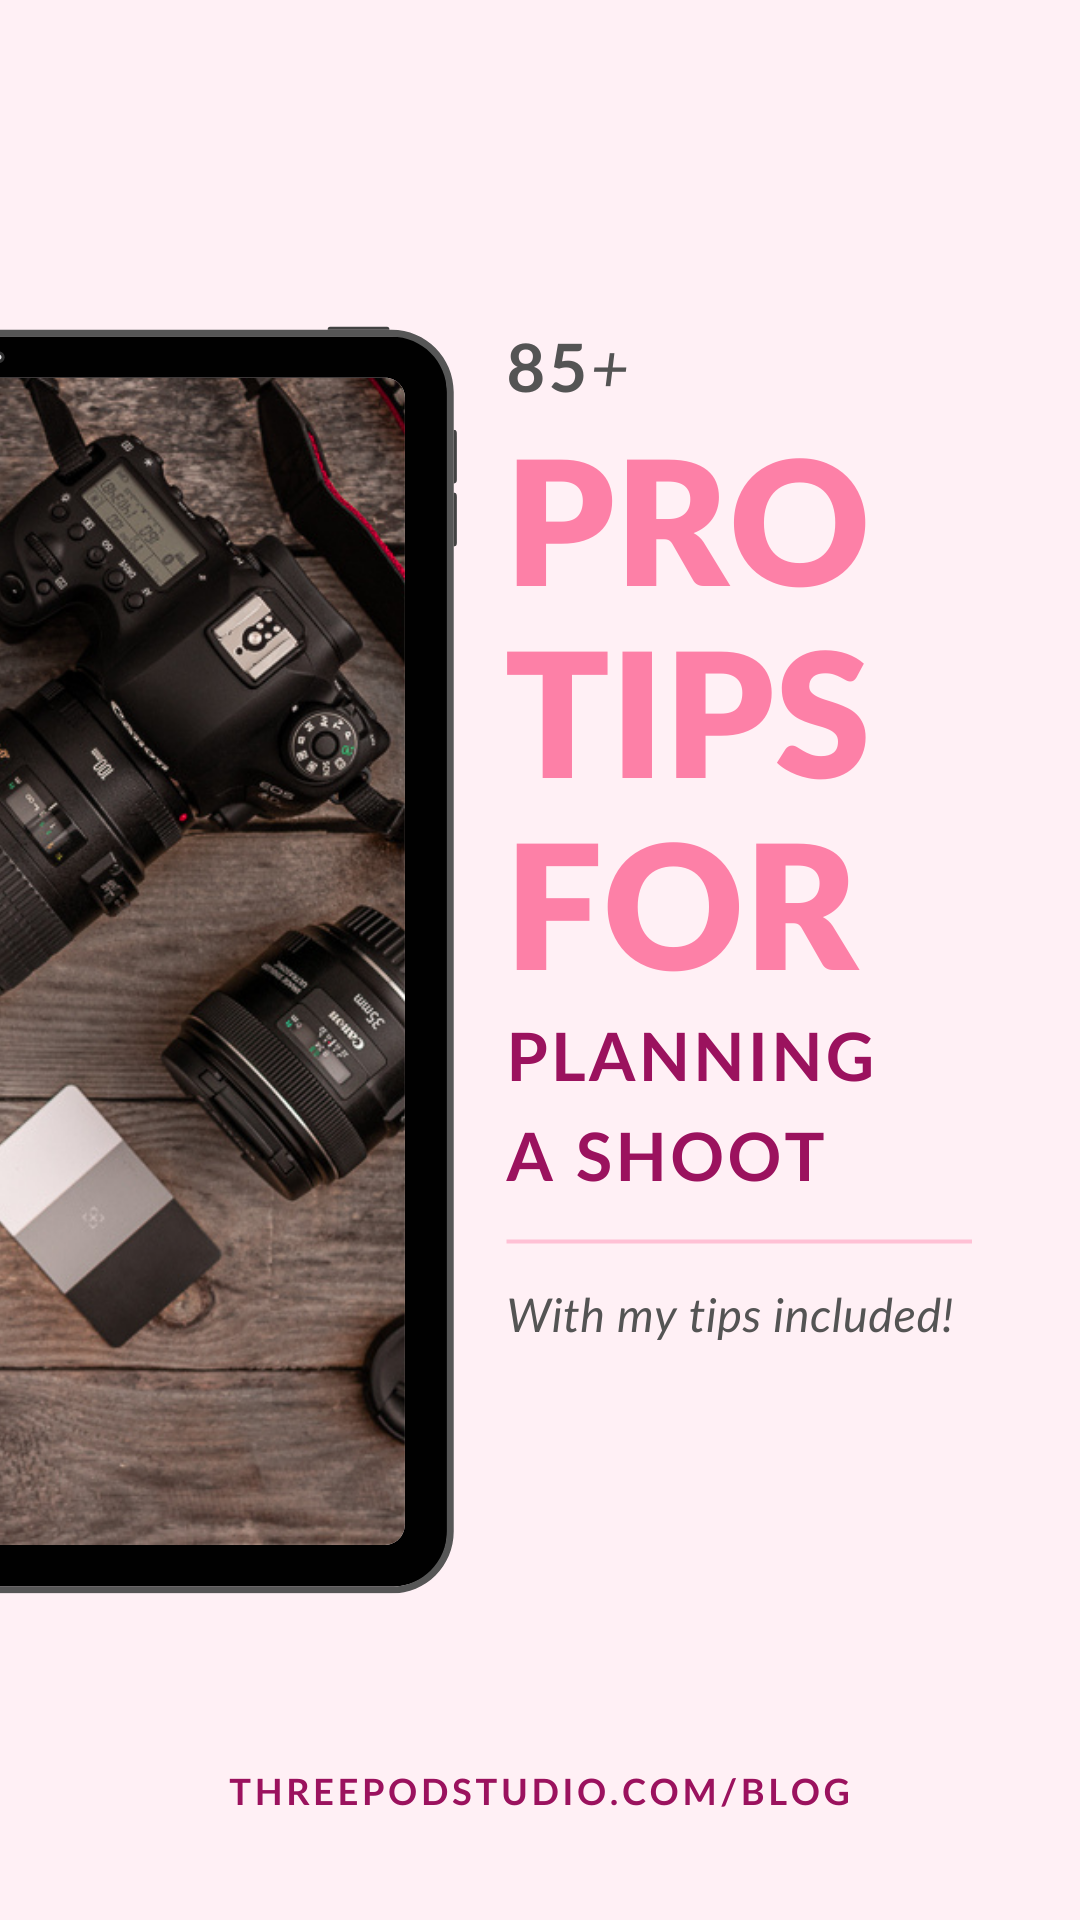
What is their pro tip for planning a shoot?
Before you scroll any further, grab your favourite hot drink or smoothie, find a comfy place, and get ready to dive into this inspiring read!
"Mood Boarding - Start with a concept to the details of your shoot."
Shiela Cruz - CPG photographer and stylist
"Constant inspiration in unconcentrated quantities, until you develop your own idea."
Anita Zsirmik - food blogger, content creator
"I imagine the dish and the color scheme of the shooting (the surrounding is equally important as the dish in my pictures). But I don’t plan a lot … I just have an idea and then the rest is quite spontaneous (depending on the greenery that I can find in the forest)."
Sophie Depetris - photographer, food stylist
"I like to start by looking for inspiration. I use Google and Pinterest to come up with ideas. Then I take it to my notebook to sketch things out. I come up with a shot list and write out everything I need for the shoot."
Kristina Cadelina - food photographer, blogger
"Ask your client as many questions as possible. Know exactly what they are looking for and what they expect. From there you can give it your interpretation and put your own creative touch on the final images."
Mikkel Jul Hvilshøj - photographer
"Confucius said that "Success depends upon previous preparation, and without such preparation there is sure to be failure". Preparation is the key to a good shoot and my favorite app to use for this are Pinterest and Notes. I gather a few examples and styles in a mood board, which give me more of a direction in regards to color composition, styling and composition etc. In Notes I then compile a shoot list where I detail every single shot and ensures that you get all the frames you need for the client."
Melissa - photographer, blogger
"Communication, communication, communication. Make sure you and the client are clear on the expected outcomes and deliverables on a shoot. This doesn't have to be a specific number of pictures, but certainly, say, number of dishes, reels to be made and so forth."
Jason Wain - photographer, videographer

Photo by © Jason Wain
"Prepare by doing some research and creating a mood board so once you're at the shoot you can have a smooth start. Some inspirations on colours, angles, composition and actions can help you get a kick start."
Kamile Kave - photographer
"Lighting is crucial. Pay attention to the quality, direction, and intensity of light at the time you plan to shoot. Golden hour (shortly after sunrise or before sunset) often provides soft, warm light that can add a beautiful touch to your photos. If shooting indoors, be mindful of the available light sources."
Sari Spåra - entrepreneur, food and wine photographer, recipe creator
"Consider preparing a mood board incorporating the subject matter, color scheme, and composition layout to improve your photography. This approach allows for a more organized and visually coherent shot planning process."
Peggy Cormary - photographer
"Do research on your subject and get an idea of how it's best to cook and photograph it. Get the best available produce you can. Its okay to look like a weirdo in the grocery store inspecting every single tomato."
Snorri Guðmundsson - photographer, recipe developer, product development manager in the food industry
"The answer is not short. There are quite a few points, and here are some that pop into my mind:
- Better to be over-prepared than not enough. I always bring extra equipment and more stuff in my boxes than I need when going to a location. I've never regretted a few kilos more than when I miss something, I knew I had it at home.
- Ask the client as much as possible. Ask them for visual references/mood boards. That is of immersive help to prepare literally about everything - from an extra lighting accessory in the bag to a teaspoon.
- Make a detailed list of everything that should be rented or bought, especially fresh products at the last minute. Get an extra bag of ice when needed.
- Have a shooting list if there is more than one setup. It saves time and mental health. :)"
Milena Ugrinova (Mim) - food and product photographer
"Visualise the final result. You can approach this by looking at the customer's examples, getting inspiration on Pinterest or through other channels. Of course, you can deviate from that image, but then you have something to hold on to."
Maaike Zaal - food- and beverage photographer
"Make a sketch or numerous sketches if you are taking more than one image. This simple step helps me work out what order to take images in and saves me huge amounts of time once my food is ready to take to set."
Jane Coupland - food photographer, food blogger
"Make some basic ideas for shots. Know the location, the subjects the food/wine to be photographed. Normally my basic ideas are not what ends up running, but other ideas come from them."
Matt Wilson - photographer

Photo by © Matt Wilson
"Setting up the scene and taking a test shot before bringing in the food."
Jules Wilson-Haines - photographer, stylist
"I spend a lot of time mood boarding, then I'll create a list of must have shots. I'll print them all out and put them up on the wall so I don't lose direction while shooting. When I have all the must have shots, I'll play around and get more creative, sometimes those will be the shots that I, and the client love the most."
Sandy Wood - photographer
"Make sure you have a clear idea of what you are going to do and what you need (props, tools, etc.) before you start shooting. I recommend to make some test shots for checking the lighting as well the setting, if necessary, with substitutes. I don't sketch out the planned shot, I only make a mood board beforehand. So, I know the general direction of the style I want to achieve and what I might need additionally. This process leaves ample room for more creativity and to implement spontaneous ideas."
Andrea Köver - food photographer

Photo by © Andrea Köver
"When planning a shot, it is essential for me to write on a notepad how I want the final image to be. Always starting with the main subject and in what "mood" I see it."
Anna Ilieva-Alikaj - photographer
"Know the food you’re shooting… how long it stays fresh for, how to make lasts for longer, the colours and textures that make it look most beautiful. Get intimate with the food, basically. It’ll turn into a story that flows…"
Natalia Ashton - nutritionist, photographer, author
"Adjusting the angle to the type of dish you're given. If it's flat, more flatlay shots. If it's tall, make sure to have a background that compliments the dish."
Robert Alvarez - photographer
"Creating a Mood board. I research colour composition, layouts, props and different lighting images to gain a sense of what would work with my chosen subject before I start."
Leeanne Mason - food photographer, photo chef, food stylist, content creator

Photo by © Leeanne Mason
"Ask for a mood board or at least some reference pictures from the client to confirm the photo directions. Both parties have to be aligned in the same direction. So, no arguments later."
Victor Chin - food photographer
Photo by © Victor Chin
"Research & mood boarding for inspiration! Whether it's for paid or personal work I always get in a little research to get an idea of mood (doesn't have to be food-related), lighting and especially colours. One main tip I would suggest is to get set on your backdrop (2 at least), you don't want to be wasting time and re-setting up each time you change backdrop."
Emilie Dorange - photographer, designer
"What helps me for a photoshoot is to have the main idea for style and mood 'ready in mind.' If I have this 'main' direction, it helps me start choosing props, lighting, and everything else."
Kata Endrődi - photographer

Photo by © Kata Endrődi
"If I’m working with a client, I like asking for what images they like. Not my images but images in general. It helps me figure out their vision so that I could prepare for the shoot."
Julia Konovalova - food photographer, food stylist, content creator

Photo by © Tibor Galamb
"I like to use Milanote create a casual mood board of sorts. It is so user friendly, just drop in inspirational images, colors, notes and any little details all in one place. I have Milanote pulled up on my computer the day of the shoot to reference and help guide me if I feel creatively stuck."
Mary Turner - commercial food photographer, stylist, chef
"Set up a mood board on Pinterest, make notes on what props and background you want to use, the color story, the intent of the image, and make a shot list."
Emily Miller - food photographer, recipe developer
"Creating a mood board is really helpful! It’s a great way to get immersed in the world you want to create, to seek inspiration, and give you ideas on the type of mood you can create. From there, selecting props, lighting your scene, even choosing your camera settings is so much easier!"
Murielle Banackissa - food photographer, food stylist, cookbook author and blogger

Photo by © Murielle Banackissa
"Good mood and decision about the style."
Sanja Alisic - blogger, food stylist
"Good lighting, clear concept, food styling & art direction."
Nicolas Newmark - professional photographer
"After the first meeting with my client, my creative team and I create a mood board to present to my client,The mood board includes, images for inspiration, color palette, textures, vibes, voice, etc. Once they approve, I go ahead and select backdrops, plates and other props to complement the shooting."
Karen Loza - food photographer and stylist
"First, I think about the color situation, that's my base for everything! I love to seek inspiration from Pinterest or from my old images. Then I think about the mood, the story I want to tell… that influences my choice for the props massively!"
Lara Virkus - food photographer
"I work with a checklist on colours, props, angles, what kind of light I want, and I make a little sketch. Nothing fancy, just putting down the idea on paper when it pops up in my head. I really should get better at preparations. I shoot in our kitchen and there is always some distractions going on or someone that is wondering when I'm done so they can start to eat dinner. :)"
Ulrica Krii - photographer, blogger

Photo by © Ulrica Krii
"Know what the story is you want to tell with your photograph and with your subject (dish). What feelings, memories, associations you want the viewer to have. And especially when you making photographs for a company, make sure you know what their story and corporate branding is. Give that a lot of thought before you do anything else (as in cooking, styling, photographing) and plan your styling accordingly with suitable props and backgrounds. A shot for a 3 star restaurant will probably ask for a totally different style than grandmother's apple pie."
Anoeska Vermeij - photographer
Photo by © Anoeska Vermeij
"Sketch it out ahead of time and make a clear shot list. If you're shooting for a client, the more you plan ahead the better. It's all about avoiding surprises on shoot day. If you can't sketch, even shooting the props and surfaces for each photo can really help get client buy-in so you won't be scrambling for alternatives while your food or talent wilts.
And when all else fails, always have a sneaky back-up plan in case a plate, bowl, or surface just doesn't pan out."
Suzanne Clements - photographer
"Take time to think through what the purpose of the image is. Is it to tell a story? To educate? To inspire? Based on the intended purpose, that will help you make decisions around food and set styling. Because if it's to tell a story and bring someone into a particular world, then you might want more unique and carefully selected props. Where if it's to educate, then perhaps you won't need any props at all and your composition will be about getting close to the food to help communicate what the viewer needs to know."
Joanie Simon - photographer
"Making sure that we have a very detailed shot list and mood board that specify, lighting, color and composition of the images."
Aline Ponce & Mike Hulswit - professional photographers
"Have the most detailed brief from the client as possible. Even when they don't exactly know what they want, propose them different ideas, a very detailed mood board and go through it with them to make sure you deliver the images they had in mind or imagined. Try to think about every stage of the process and what might go wrong/what kind of problem you might face and how to overcome them, so, on the day of the shooting, there will be the least amount of surprises."
Susi Bálint - stylist, photographer, writer
"I always get ideas from Pinterest and see styling and colours. Then I look for my props and then I compare, and then I organize my thoughts and make some simple drawings. When I start to shoot I always have all the things I need to take photos. But to make good photos you have to bake a good looking cake, pie, cookie... etc. It also has to be planned."
Emese Balog - food blogger
"Ask questions, develop a pre-shoot list, and organize props and backdrops for convenient access."
Maxine Lock - photographer
locklickimages.com.au

Photo by © Maxine Lock
"Make sure you have all your props ready before you shoot. Set up your scene, and create your composition before bringing any food to the table. Planning ahead can save so much time - if baking make sure you have all your ingredients before you start (ideally the day before, so no dashing to the store because you don’t have an ingredient half way through cooking! Trust me I have learned the hard way!)"
Birgit Mayled - photographer
"Write down all your ingredients and props and sketch out a few ideas (ideally in color, a tablet is great for this) so your brain can start to work on set-ups, shooting angles and light."
Dorothy Porker - food writer, photographer
"During the planning stage, draw out a rough and simple sketch on a piece of paper that shows the camera angle, position of hero, tentative position of the props and note down the colour scheme. Have a vision for the direction of the photo and then begin shooting. This allows to exactly create the vision we have for the photo, a great exercise for those wanting to pursue food photography professionally."
Dyutima Jha - food photographer, food stylist, podcaster
"Visualise what you're trying to capture or use Pinterest if you don't have any inspiration for that shot... it really can help. Also keep in mind what the client wants, what kinda vibe it is and is that shot/style going to fit with your client restaurant etc."
Maurizio Previti - photographer
"For commercial shoots, I start by creating a brief and discussing it with the client, identifying the key features of the product. For creative shoots, it is important for me to shoot immediately and I can start without preparation. When an idea comes, I aim to capture it instantly while the inspiration and energy from the idea fills me. Otherwise, the idea won't seem very interesting after a while."
Halyna Vitiuk - food photographer
"Invest time in thorough preparation and planning before the actual shoot. This includes:
- Shot List: Create a detailed shot list outlining the dishes you'll be photographing and any specific shots or angles you want to capture. This serves as a roadmap for the day, keeping you organized and focused.
- Prep Ahead: Prepare ingredients, props, and any necessary equipment well in advance. This minimizes downtime during the shoot and allows you to concentrate on capturing compelling images.
- Scouting Locations: If shooting on location, scout the area beforehand to identify potential setups and address any logistical challenges. This ensures a smoother workflow on the day of the shoot.
- Natural Light Consideration: If using natural light, be mindful of the time of day and how it interacts with your shooting location. Plan your shoot around optimal lighting conditions.
- Backup Equipment: Have backup camera equipment and essentials on hand in case of technical issues.
Being prepared for unforeseen challenges can prevent unnecessary delays. By investing time in thoughtful preparation, you set the foundation for a more efficient and successful food photography shoot."
Alessandra Zanotti - food photographer, food stylist

Photo by © Alessandra Zanotti
"I always prepare a mood board with images that I like and that I’m going to use as inspiration. I also try to choose all the props I’d like to use in advance and mock up the shot, trying different angles and lighting."
Elisa Marina Orani - food photographer
"I need to know as much details from the client as possible."
Mihails Pavlenko - food and product photographer
"Start with a mood board, always."
Shwetha Elaina - food photographer and stylist
"
- Have a discovery call with the client to understand the requirement.
- Document everything in greater deatils with sample images / references and everything possible and get the client approvals so you can make sure both you and client are on the same page.
- Visit the locaiotn prior if its an on location shoot so you will have an idea bout the lighting and the place so it will be easy for you to plan yout equipments and other things.
- Plan the props / backdrops /equipments needed and make a check list so you can doble check when packing for the shoot.
- Always keep a backup camera, and equipments - keep your battries charged, memory cards formatted."
Anjala Fernando - food photographer, food stylist
"Planning a shot according to me always involves thinking about the following things:
- Lighting and mood
- Props to be used
- Composition that I will use."
Gouthami Yuvarajan - food and product photographer
"Think about what story or message you want to convey, first and foremost. This will help you determine what props, backdrops, lighting, etc. to use. Even if this changes throughout the shoot, it gives you a starting point."
Felicia Chuo - photographer
"Have a written or running checklist in your head. I like to include:
- Is this dish hot or cold?
- What props do I have/need?
- What angle is best for the dish? Flatlay or Still Life?
- What type of light would work best? Backlight, sidelight, diffused or hard?
- What garnishes do I need to make this look as delicious as possible?"
Anisa - photographer, recipe developer
"Determine what the main topic of the session is. Determine whether daylight or artificial light is enough for the session. From the entire range of colors, choose only three that you will use during the session. Consider what dishes and accessories you need."
Monika Grudzińska - photographer, food stylist
"Usually when I plan a shot, I make a small brainstorming about what I would like to say by the photo. For me it is not necessary to spend hours by planning, but I need to have clear vision before, to do not loose time (and natural light) - I usually think about atmosphere, story, colors, props in advance."
Alena Prichystalova - photographer, blogger
"Plan the schedules and logistics first, then the gear, props and ingredients."
Veera Rusanen - photographer
"Plan the mood board."
Sangita Bhavsar - food blogger, photographer, stylist
"Preparing a mood board before the shooting."
Massiel Zadeh Habchi - food photographer and stylist
"First I carefully read the recipe, which I photograph. Reading the recipe I start to take notes and imagine the colours of the ingredients and different structures. Next step is to think about the atmosphere and the emotions that I would like to create. Getting the viewer involved is very important to trigger emotions or to tell a little story – like a preparation sequence. For more insights and inspiration, I always do some Internet research. Then I create a small mood collage, with colour palette, materials and ingredients. Next, I come up with a concept and choose stylistic devices, which can convey the desired effect. After that I go on to collect the suitable props. You always start with an empty stage where you want to spotlight your dish. You have to equip the stage so that your protagonist – the food – shines at its best. Styling and food styling are just the supporting actors. Their task is like make-up: to emphasize the protagonist. After buying the ingredients, the photo set styling begins. Next step is to cool and prepare the food. Then you arrange the food in the photo set and take the picture."
Carolin Strothe - professional photographer, food stylist, stylist, art director, author
"I create a mood board around the subject I want to shoot. I look at the colors that inspire me, the materials, the atmosphere, the angles of view. The day before, I gather all the equipment I need, if I can I set up a tripod, background and light so that I can be more efficient on the day."
Constance Ibañez - food stylist, food photographer, food event creator

Photo by © Constance Ibañez
"I love a good storyboard and letting that simmer in my mind before a shoot. Being prepared and having a full picture of what I'm about to do not only lets me be efficient but also allows me to be creative in the moment."
Saara - photographer
"Always ask yourself about the goal of this shot. What is the story, what are you trying to convey, how would you like the viewer to feel? What is an important message?"
M. Aimee Tan - food photographer, videographer, stylist, content creator, recipe developer
"Sketch out a rough draft of your image before you start using a composition grid. This allows you to think through your composition first and have an idea before you walk on set."
Lauren Short - food photographer
"Create a mood board where I decide all the colours and angles of the photoshoot."
Marika Cucuzza - food photographer, content creator, recipe developer, food stylist
"Start with a more or less clear vision in mind. Personally, I like to visualize the final photo(s) when I am relaxing. This way the vision is clear and I only have to “execute” (but I also like to “freestyle” sometimes ;) )"
Roberta Dall’Alba - photographer
"Before starting a photoshoot I give myself a few minutes to imagine what I actually want to see on the picture. This is when many ideas come, but I always try to stay focused for the best possible result.
Usually I start by choosing the background. I make them myself which also helps to stay unique. After that I select the accessories that match the food: spoons, forks, plates, decoration pieces; all that reflect the food or its taste and help to tell a story. I think these are important parts of the picture – in addition to the food – as they help to fill the picture with more emotion. But keeping in mind not to take away the attention from the key element – the food.
After these preparations I need the food and I can begin creating the composition. There are times that during the photoshoot the design changes, but this never interrupts me. In these cases often a better idea surfaces and I’m happy to explore it further."
Liliána Tóth - food photographer

Photo © Liliána Tóth
"Be sure to create an inspiration board (I use Pinterest for this) to create a vision in your mind of the scene, both in terms of colours and textures. My second piece of advice is to lay out all the additional accessories - backgrounds, props, fabrics - to assess how they work together and make it easier to imagine the dish or product in this scene."
Katarzyna Anders - food and product photographer and stylist, recipe developer, content creator, blogger
"Start early and plan for extra time. Something will likely go sideways and this has been true especially for shoots I made the mistake to consider "easy". Leave enough time for each part of the process. I never edit the same day when I shoot and I never submit the work to client the day I edit. Our brains and eyes get tired and we need time to recover and check again and make small adjustments before we turn the final images in."
Andrea Gralow - professional commercial and editorial food photographer, videographer
"Per-Planning. Right from the colour theme to the background, the lighting etc. Basically, create a mock mood board beforehand."
Indrajeet Nishad - food photographer and stylist
"Know what the story is you want to tell, and the emotion you want the audience to feel when looking at your video/photo. It's the red thread that will guide you through the process."
Julia Wharington - photographer, videographer, stylist
"I like to plan by drawing my idea and listing everything I need."
Jella Bertell - food blogger, photographer
"When planning a shot, consider the lighting conditions, framing, and the story you want to convey. Pay attention to details like composition, focal points, and background to create a visually compelling image. Experiment with angles and perspectives, and don't be afraid to try unconventional approaches. Lastly, ensure your subject is well-lit and captures the essence of your intended message."
Anna Janecka - photographer, food stylist
"Always plan as much as you can, whether you're shooting for a client, your blog or other content, or for a personal project. Absolutely test your lighting before a pro shoot so you can anticipate the results and any problems that may crop up. Choose your props, backdrops, and roughly sketch out your compositions so you know what angle will best complement your subject. Planning is part of the creative process and the more you prepare up front, the better your results will be."
Darina Kopcok - food photographer, educator
Photo by © Darina Kopcok
"The mindset! It is absolutely advisable to prepare props, ingredients and lights beforehand. It is also nice to have a clear vision for a shooting. But a creativity cannot be forced. It comes from a state of mind. It happens that the best photo from a shot is the one I took at the end, while I am already sure I've got my winning shot. When I relax and just play with the scene I allow the creativity to flow through me. Some parts of the shot definitely needs to be planned while the creativity kicks in when we just let the creativity to take over."
Mojca Klepec - food photographer
"If you appreciate the beauty of natural light in your photography, consider checking the weather forecast and aligning your shooting day with favourable conditions for the best results. When I plan natural light photography sessions, I like to include an extra buffer of 1-2 days in my calculations. This way, I can account for any discrepancies in the weather forecast and ensure a smoother and more flexible shooting experience."
Melinda Bernáth - food photographer
"STORYTELLING
I craft a narrative to guide all my decisions on composition, food styling, lighting, and editing. This ensures a cohesive and purposeful image, where every element contributes to the broader tale."
Anita Zivkovic - food photographer, photography coach
Photo by © Anita Zivkovic
"I make test photographs with the raw ingredient(s) I want to work with before cooking and preparing the dish I want to shoot."
Terri Salminen - blogger, food culture researcher
"I usually plan everything in a drawing including lighting setup before the shoot."
Harsha Sipani - commercial photographer
"One of the key aspects I always keep in mind while planning a shot is the colors and textures used. A well-coordinated color scheme stands out - yes; but we need to focus on what the subject demands. And not necessarily go with contrasting backgrounds for all subjects. E.g. While clicking whole groundnuts - which are pale in color- I would not go for a contrasting color background but I could make the whole shot monochrome by using the same colors!"
Yashaswita - photographer
dashoflime.co
"If needed, I do test shoots to know what I need and how to go about reaching the desired results. During the shoot, things will go wrong, which requires on-the-fly solutions. That's where experience kicks in."
David Pahmp - commercial advertising photographer
"Always plan ahead with story boarding your photo session, write down the list of props, shots and final results you want to achieve."
Dina Hassan - food photographer, videographer
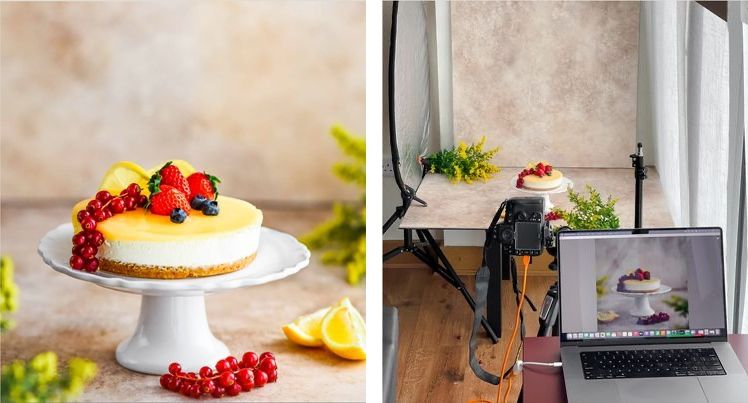
Photo & BTS by © Dina Hassan
"I use my notebook or Procreate to sketch each scene I'll need to cover. I always note down all the variations I shoot for each scene. After going through these, I also spend time with ad-hoc experimenting. Many of my favourite shots come from creative moments when I do free interpretation with no prior planning."
Reka Csulak - photographer, mentor

Photo by © Reka Csulak


