
When we start to create compositions at the beginning of our photography journey, the best thing we can start the learning curve with would be to understand the basics. We already talked about aperture, shutter speed, dark and moody, and light and airy food photography, then also discussed how to incorporate human elements into our scenes. Now let's see all the reasons why you should photograph your dishes from a specific point of view, like from the 3/4 angle.
In this episode of the 'Let's Talk About...' post series, you will learn more about how to make the best out of this popular angle. I will talk about the most important considerations and technical or stylistic choices that together create the most attractive images.
Are you ready to improve your photography and styling skills? Let's do this together!

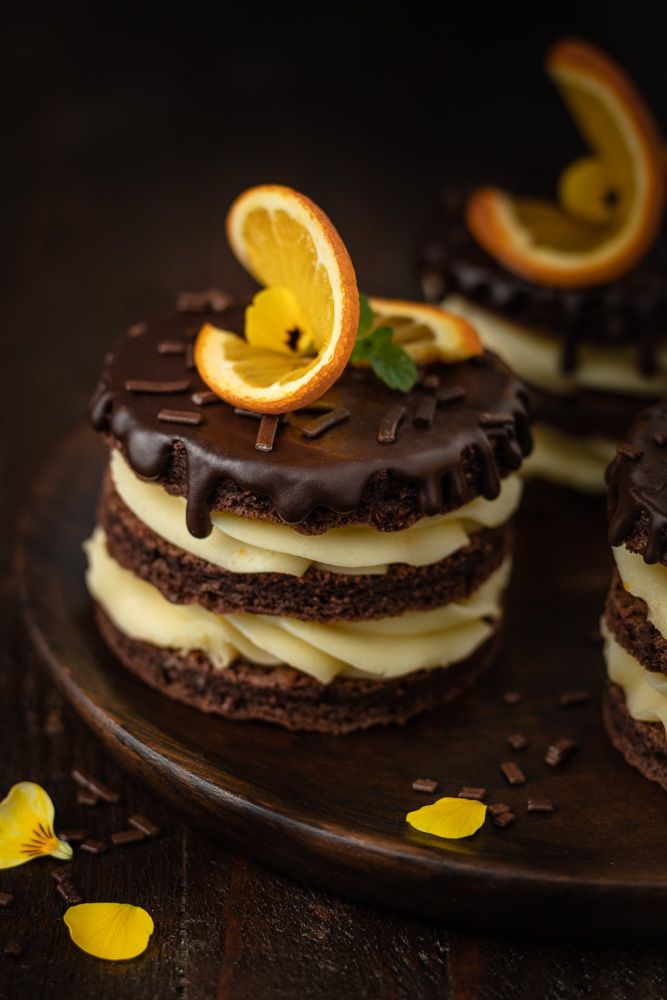
Chocolate - Orange Mini Cakes - Photo by © Reka Csulak
Why do we need different angles when capturing food or drink?
When you think about a casserole, a layered cake, or a beautiful bottle of wine they show their best from certain angles, such as we have the best posture for our own portraits where the camera's angle and position also matters a lot, as it can make or break the image. This is exactly the same when we are capturing food or drinks, so the best possible mindset is to think about your subject as your hero and handle it this way: your hero needs a photograph in "its resume", where it must look at its best, and it is your responsibility as a photographer & stylist to make this happen and find the 'hero angle'!
Choosing the right camera angle and position is essential when composing our scenes. A perspective that works for one food but might doesn't complement another, so again, when planning the composition, think! You can have the most beautiful hero in front of you, the best ingredients, the luxury elements, but you can easily miss out on creating an image with a "wow" effect.
How can I create the best portrait of my hero?
The main angles we capture our food or drink heroes are:
- head-on (0-degree angle),
- 3/4 (25-75-degree angles) and
- overhead (or 90-degree or flatlay).
There are slight variations in addition to these, but these are the main ones that hobbyists and professionals use most of the time. You can find an example for each below:
Head-on - Photo by © Reka Csulak
3/4 - Photo by © Reka Csulak
Overhead - Photo by © Reka Csulak
We will discuss the other two angles in detail in separate posts, but now let's learn more about the 3/4 angle which we also call...
The diner's perspective
The unique perspective that 3/4 angle provides naturally makes us salivate, and the reason behind this is quite simple: this is how we see the dishes plated in front of us. This is one great advantage that this point of view provides to us because we can stimulate the viewer's core instincts and make them crave our hero by seeing it from this angle.
When we shoot from a 3/4 angle, the camera's angle varies between 25-75 degrees in relation to the subject. If you are ever in doubt about what angle to choose for your hero: start with the 3/4 angle and do the fine adjustments from here.
Let's discover the whole spectrum!
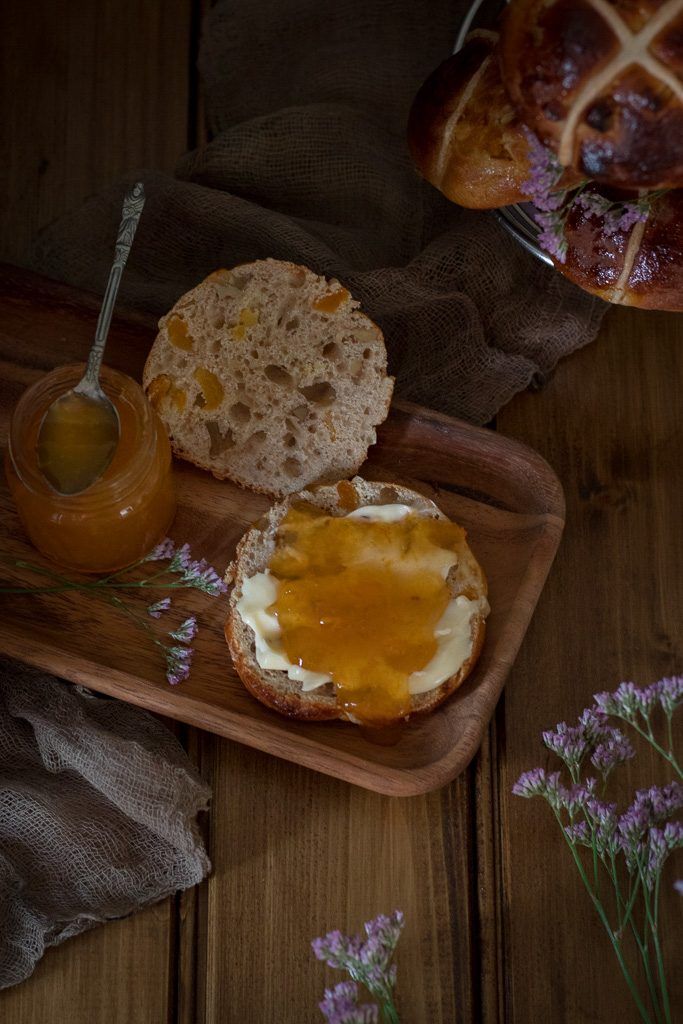
The 75-degree angle
is very close to the overhead angle, but the camera is slightly tilted. This can show more details and creating certain reflections, textures or highlights that the overhead angle cannot provide. Perfect to show the beauty of flat heroes. With this angle, the glasses won't look like floating circles like they do on a flatlay, regarding we can slightly see their sides.
The type of heroes look the best from this angle:
- drinks with beautiful garnishes on top
- when the layering or the silhouette of the glass is not important
- drinks served in non-transparent glasses or mugs
- larger tabletops
- tart, pie, galette, and slices
- cookies
- soups, smoothies, and other dishes plated in deep bowls
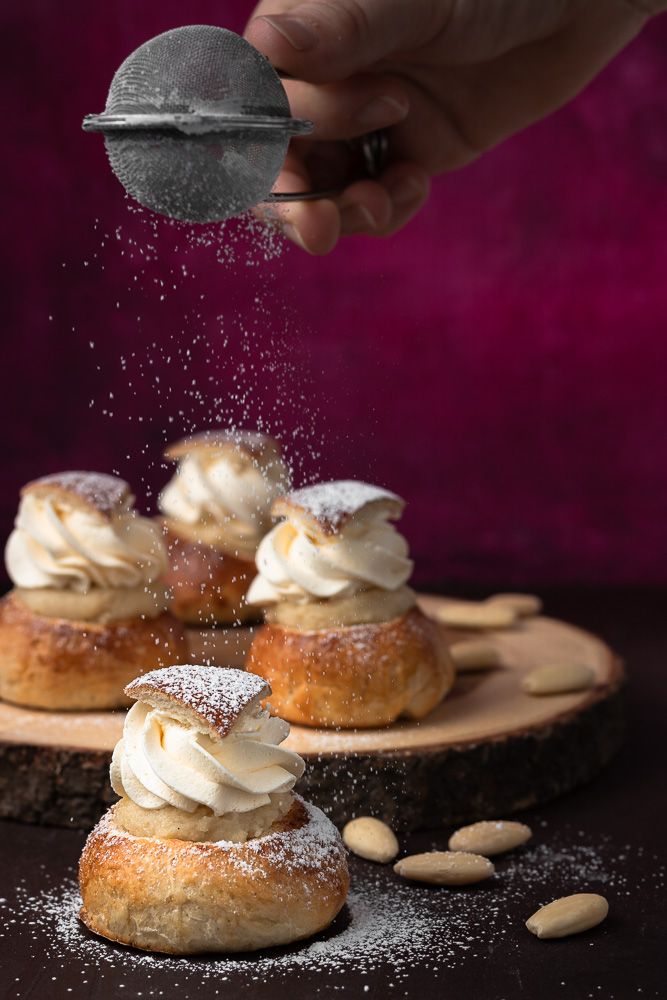
The 45-degree angle
is the most popular is of course, as it shows enough details of the sides and the top surface of the hero very well at the same time, it allows us to focus on the details, and it is very common that the horizon-line is not visible. Also, it is perfect to show the environment out of focus.
The type of heroes look the best from this angle:
- trifles and layered desserts served in glasses
- Swiss rolls
- cupcakes
- one-layer sponge cakes
- open-faced sandwiches
- cupcakes
- stacked food (American pancakes, waffles, french toast)
- salad bowls
- soups, creams, smoothies, breakfast bowls with toppings
The 30-25-degree angle
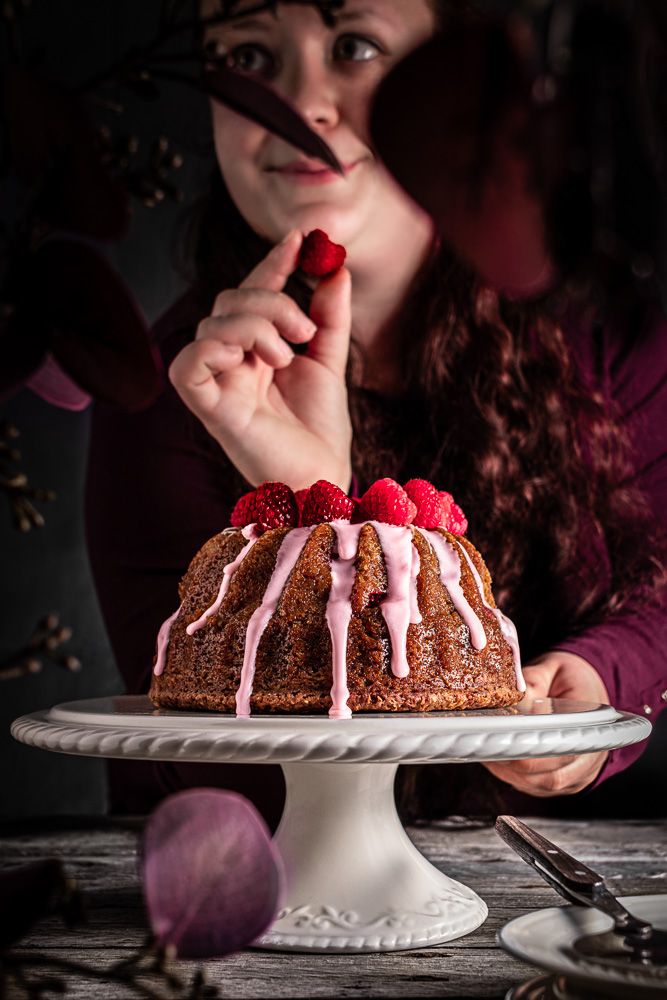
comes handy when we wish to show the background and the environment a bit more. With this point of view normally the horizon-line reappears too. This angle can give the viewer a good clue about the real depth of a bowl and is also perfect for presenting taller heroes.
The type of heroes look the best from this angle:
- hand-held dishes and drinks
- multi-layer cakes and slices
- dishes in shallow bowls
- stacked food (American pancakes, waffles, french toast)
- cupcakes
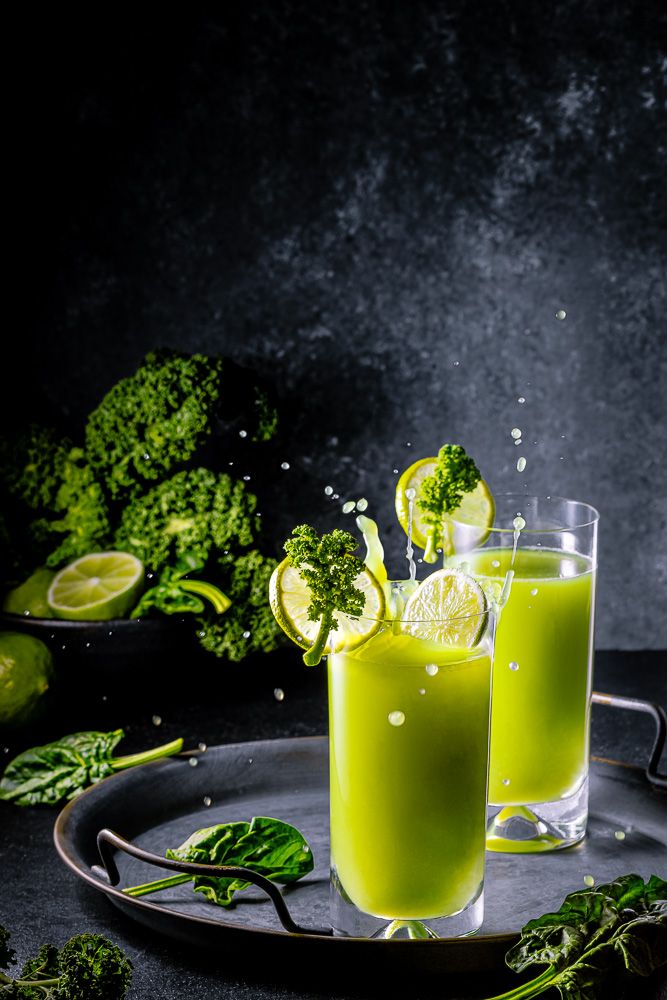
- cocktails with garnish
- drinks served in a tall glass
75-degree angle - Photo by © Reka Csulak

45-degree angle - Photo by © Reka Csulak
30-degree angle - Photo by © Reka Csulak
Get the best out of it
Consider the following when creating your composition and making decisions on the camera angle:
Does your hero is falling into the tall or flat category?
- tall: experiment with angles at and below 45-degree angle or head-on
- flat: experiment with angles at and over 75-degree angle or overhead
If your hero or scene has layers?
- yes: experiment with angles at and below 45-degree angle or head-on
- no: experiment with angles at and over 75-degree angle or overhead
Try the recommended angles but also try and experiment with the angles out of this range. We all have acceptable, good, and great images from the same photoshoot, and this is the best way to teach yourself to see the potential in each dish and accelerate the process of capturing your subject from its 'hero angle'.
Choose your props beforehand while thinking about your hero, because the additional elements can heavily affect the composition.

Mulled Wine Strudel - Photo by © Reka Csulak

Eggs Benedict - Photo by © Reka Csulak
Exercise: Finding the 'hero angle'
Let's examine the 3 heroes I mentioned at the beginning of this post and that you can see below. Think about the results you could possibly get by using all the three most common angles.
Make some notes on your own for each dish, examining all 3 angles (head-on, 3/4, overhead), then read my reasoning under the pictures.

Casserole - Photo by © Reka Csulak
Layered cake - Photo by © Reka Csulak

Wine bottle - Photo by © Reka Csulak
Casserole (flat, not layered/layered)
- Head-on: a casserole has a kind of flat surface, so this angle really does not work with casseroles, as it shows only the front/sides of the ceramic dish but we barely see what's inside, which means this is not the right choice for this hero.
- 3/4: this angle is perfect especially when we take one spoonful out of the casserole, because the inner layers and texture also become visible together with the top of the dish, so this is one good angle that compliments our hero.
- Overhead: this angle is perfect to show the top of the dish, especially when there is repetition in the arrangement of the ingredients. If you take a spoonful out of the dish, you can also show the inner texture. When you use a nice ceramic or glass dish, its shape can appear as an element of the composition and also help to create a nice framing. - HERO ANGLE
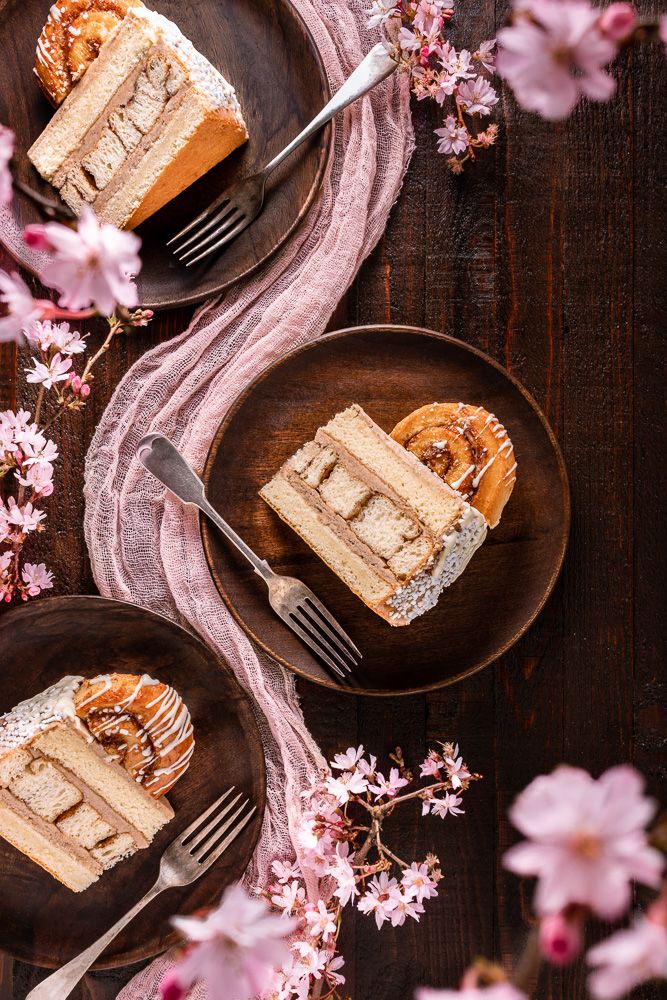
Layered cake (tall, layered)
- Head-on: as the cake is normally a well-decorated, sometimes multi-layer creation, this dramatic angle will work quite well with this hero.
- 3/4: normally the top of the cake is nicely decorated, so by choosing this angle we can show not only its height and layers but the details on the top as well, which also fits this hero perfectly. - HERO ANGLE
- Overhead: a cake has a beautiful, often geometric shape, and especially with a multi-layer wedding cake this could be an interesting point of view too, where we can show the decoration and its beautifully executed repetition from an unusual perspective.
Wine bottle (tall, no layers)
- Head-on: the best way to show a wine bottle as a hero is to capture it from this angle. The shape and the label are clearly visible and readable, there is no distortion, which is highly desired especially in commercial photography. - HERO ANGLE
- 3/4: this angle works at lifestyle scenes, where we place our hero bottle into an environment and create a mood around it. The label can still be readable but the bottle suffers minor distortion that is totally OK on lifestyle scenes.
- Overhead: unless there is an important vax stamp or branding on the top of the cap that you need to show on a close-up, I would not recommend this angle for this hero as it shows so little from its attributes. When there is a wine bottle on a table but it is there as a prop but not as a hero, that is perfectly fine to capture it from above.

Whiskey Eggnog - Photo by © Reka Csulak

Pumpkin Spice Blondies - Photo by © Reka Csulak
I invited a professional photographer friend to process this topic by digging deeper into the stylistic and technical considerations about creating amazing compositions by using the 3/4 angle on our photos, so welcome Dyutima Jha on board!
Who are you and what is your photography specialty?
I am an architect turned food stylist, photographer & recipe curator. My motto being – ‘put your best food forward’.
After a decade of practicing healthcare architecture & designing healthcare facilities, I stumbled upon food styling & photography, which turned into a passion rather swiftly.
Through a modern yet artistic style, I like to bring the colours & textures of ingredients to life & present them in the best light. My love for flavours leads me to curate new recipes & the architectural background guides me in punctuating taste with aesthetics.
The power of visual story telling inspires me. My photography style rides on evoking memories, bringing upon nostalgia & instilling emotions while exuding a strong sense of movement.
Turning a 2-D image into 3-D with light & shadow and adding a 4th dimension of emotion is what I strive for.
I am also a mom, foodie, red-wine enthusiast & piano student. If I ever go missing, you’ll find me at a farmer’s market.

Portrait by © Dyutima Jha
We often capture food from 3/4 angle. How does this perspective help the viewer in discovering the hero dish?
3/4 angle is one of my favourite angles to capture hero dishes. The range of the 3/4 angle varies from 25 degrees to 75 degrees making it highly versatile & suitable for photographing a variety of food.
The beauty of the angle is that it allows the viewer to not only see the top & sides of the food but also the shape & form of the dish it is served in. It allows the viewer to peek into the dish giving a feeling as though the food has been served to them. The 3/4th angle allows the viewer to see the food closest to how they would see it when served in real. This adds interest to a composition & strengthens the character of the hero portrayed.
Being able to select an angle between the 25 -75 range allows the photographer to determine the most appropriate perspective for the subject.
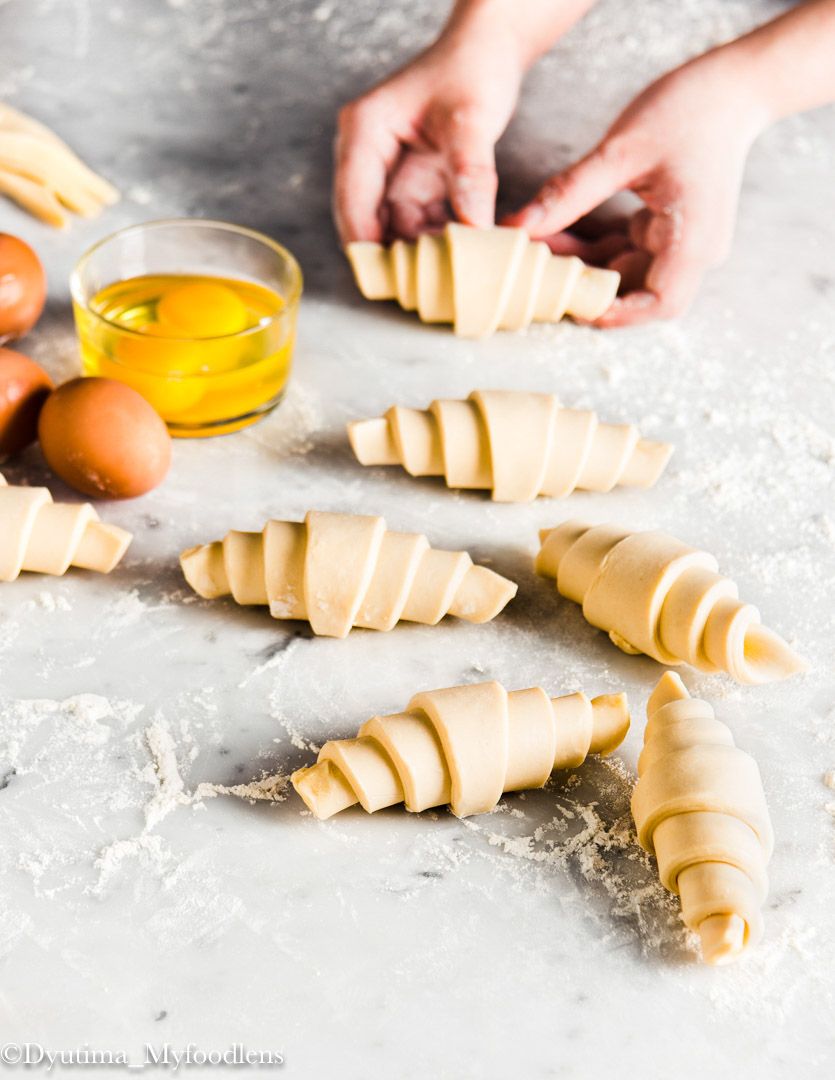
Photo by © Dyutima Jha

Photo by © Dyutima Jha
What are your technical and styling preferences when shooting a scene from 3/4 angle?
Technical preferences
I like narrow focal lengths to capture food at 3/4 angle. As a Nikon user, I usually choose a 70mm, 85mm or 105mm lens. My favourite is the 105mm, of course. While it brings out the intricate details of the food, the best part is that it minimises distortion. A wider focal length such as 50mm tends to create greater distortion when positioned at “non-perpendicular” angles.
A 105mm lens on a full frame camera offers the flexibility to create larger compositions for story-telling or to get close to the subject for a macro details. It also offers the opportunity to include beautiful blur in the background & foreground while keeping the hero in focus.
Styling preferences
The styling of the scene depends on the story. I like to create a variety of heights in the composition that leads the eye through the scene instilling a sense of movement.
Creating layers in the composition using both, ingredients & props & using a wider aperture helps to focus on the hero without getting distracted. This also adds interest to the story.

Photo by © Dyutima Jha
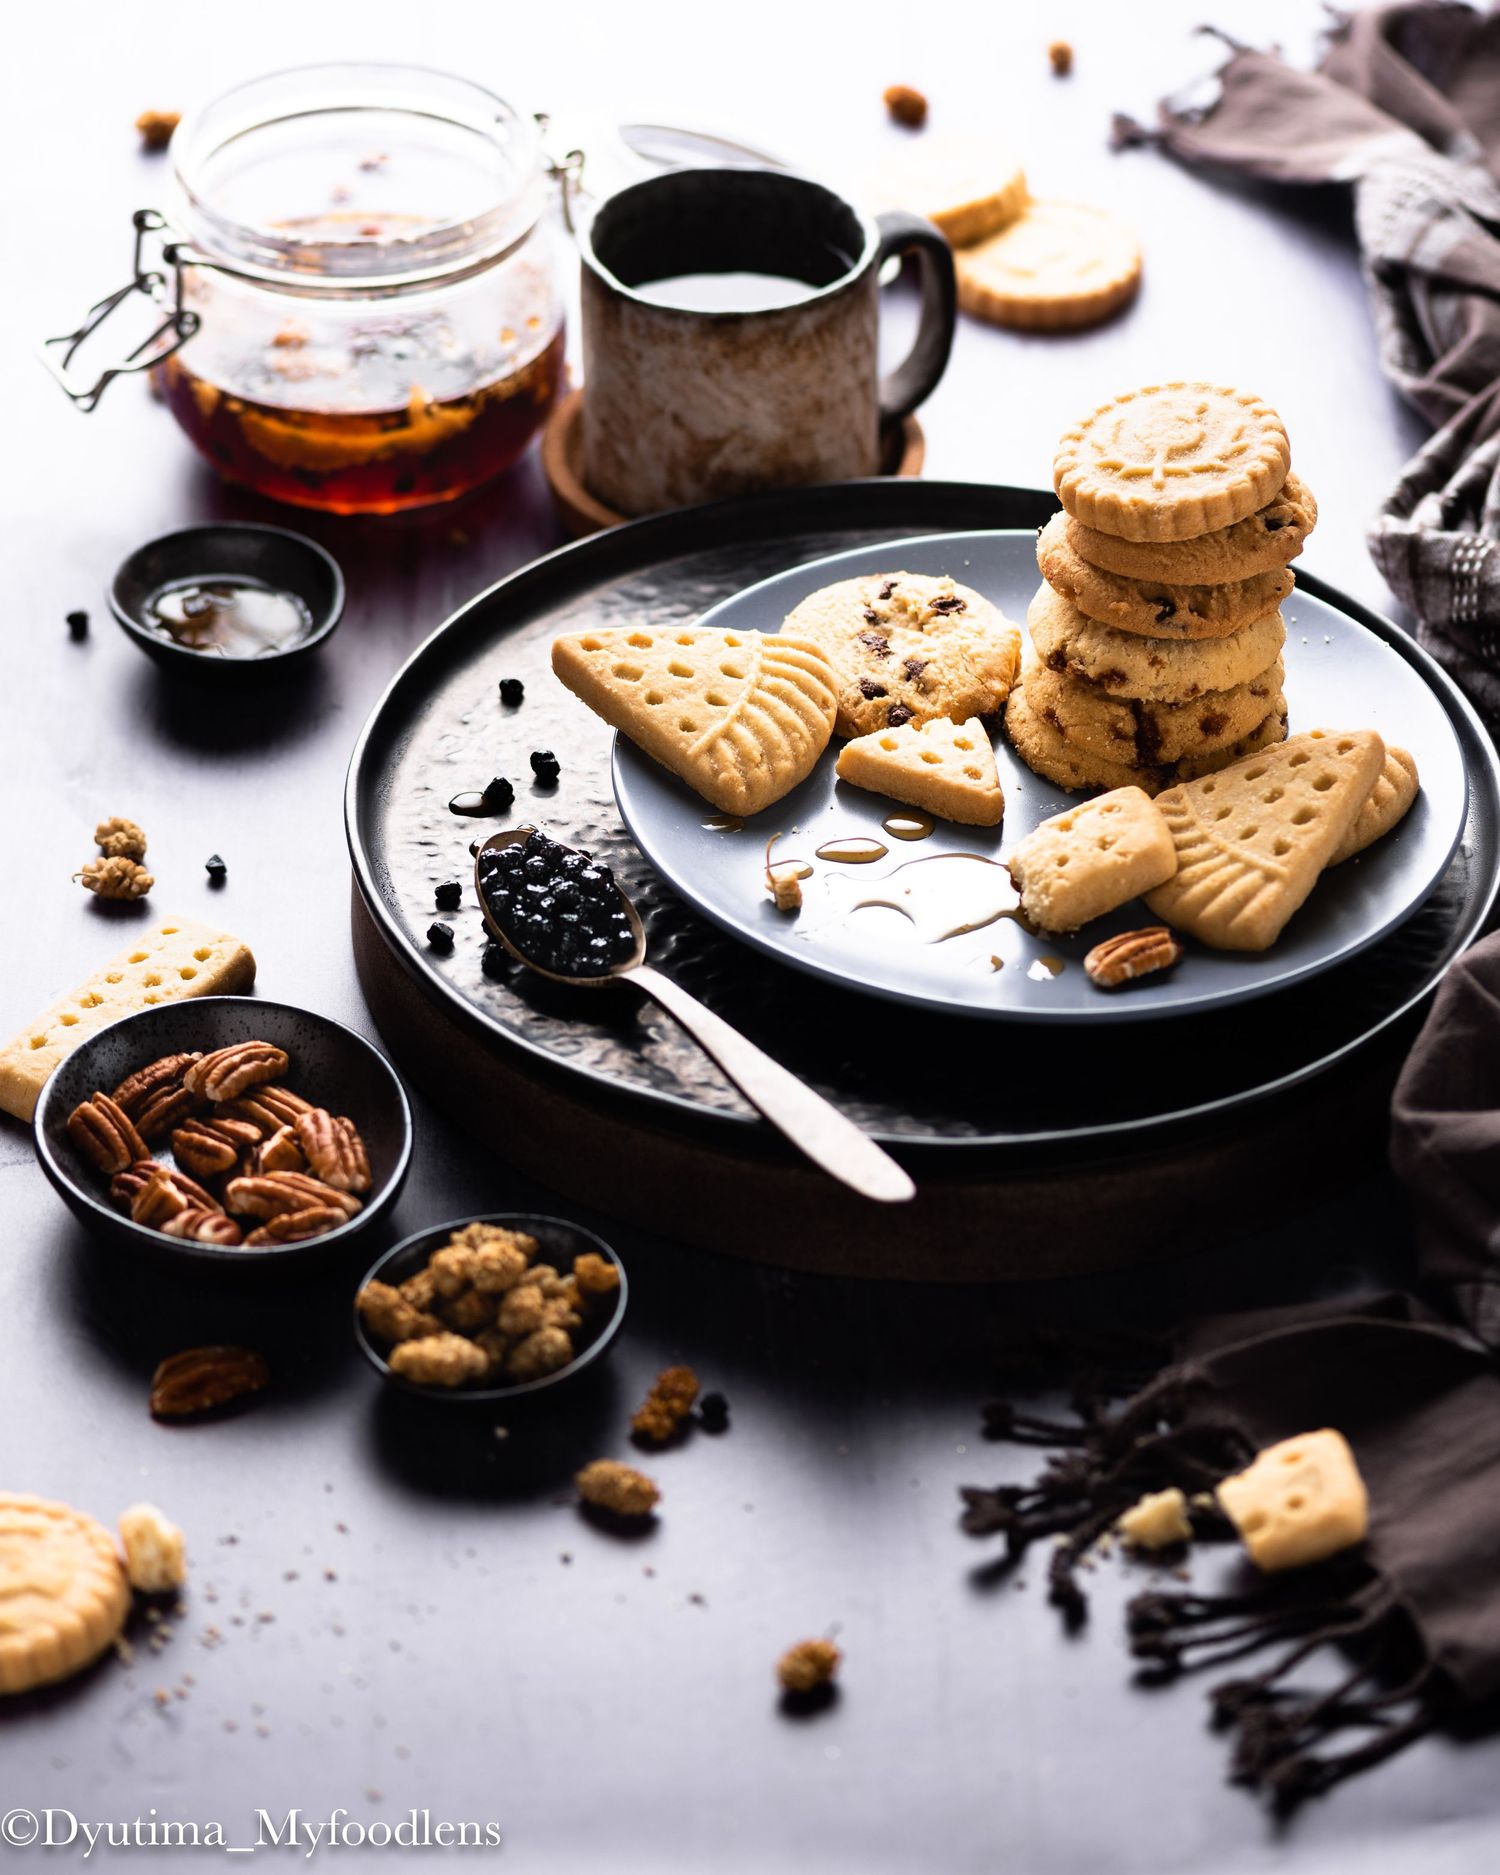
Photo by © Dyutima Jha
With 3/4 angle we can find ourselves in the situation that the horizon becomes a harsh line across the scene, which could be distracting. What is the easiest way to overcome this challenge?
The horizon line usually appears when the angle chosen is around 20-35 degrees.
The easiest way to overcome the harsh line is to change the angle to 45 degrees or higher. That way only the base backdrop is visible, eliminating the need for another backdrop at the back.
If a higher angle does not work for the food to be photographed, a wider aperture may be used to soften the line. The hero can be placed further from the line & be the point of focus so that the line can be beautifully blurred.
It also helps if the colour tone of the base backdrop, on which the food is placed, is similar to the one at the back. They merge seamlessly & the line appears more cohesively in the composition.

Photo by © Dyutima Jha

Photo by © Dyutima Jha
What lighting setup(s) work for you the best with 3/4 angle?
I love the combination of 3/4 camera angle and side-back light.
When the light falls at a diagonal, on a composition that is being photographed at a 3/4 angle, it gives a feeling of direction to the picture. I particularly like to use that setup when working with drinks, glossy food or exaggerated textures.
Side light is another versatile setup that I use for lighting a scene evenly. When the story does not dictate much drama, placing the light perpendicular to the food & adding a reflector across from it helps achieve a bright mood.

Photo by © Dyutima Jha

Photo by © Dyutima Jha
Make sure you check the website and other beautiful images of Dyutima by visiting her
- Website: myfoodlens.com
- Instagram: @dyutima_myfoodlens
- Facebook: @myfoodlens


